


DIY Acid Etching
DIY Acid Etching is an art style that is easy to learn, but difficult to master. By selectively using acid to burn away parts of a piece of metal, you can create spectacular works of art. But one of the best parts about the process is that it can be used in a variety of unique styles. Printing plates, decorative plates, jewelry, and knife blades are all popular items for DIY acid etching. Follow the simple steps below, and you will be on your way towards becoming an expert in no time!
What is Acid Etching?
In short, etching is a process where you use acid to create images on metal. The process involves coating the metal in an acid resistant substance, appropriately called the Resist, then either leaving areas blank or scratching away the cover to make an image. This reveals part of the metal which is then partially burned away (etched) by the acid.
We’ll explain specific details about the resist shortly, but for now, just know that the resist protects the underlying metal from being burned away by the acid.
There are also two main styles of etching. In one, you cover the whole material in a resist then remove the resist to make an image. The acid will only etch that specific part, and so the recesses cut into the metal by the acid make the image. The other option is where you leave most of the metal exposed and use the resist to create an image. In this style, most of the material is etched, and so the slightly elevated non-etched parts make the image.
The most popular metals for DIY metal etching are copper, brass, and nickel silver. Though zinc, and even iron have historically been popular. The first known acid-etched image was done on an iron plate in 1510 by Daniel Hopfer.


Mild Steel and Stainless Steel are both increasingly common choices for metal etching due to the rising prices of copper and zinc. Steels have become particularly popular for printing plates. Because steel is very sturdy, even as thin sheets, it works well for this purpose. For a complete tutorial on DIY acid etching steel, check out this wikiHow post.
What is Intaglio Copper Etching?
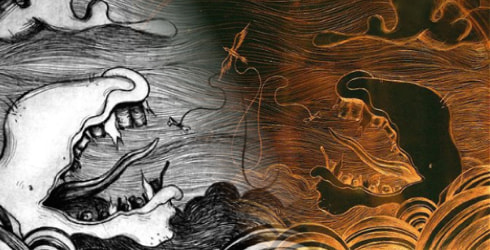
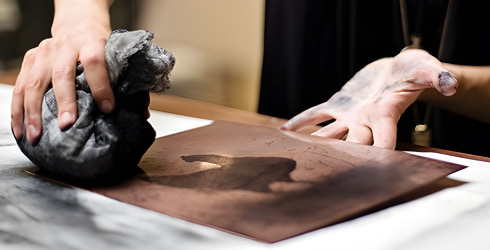
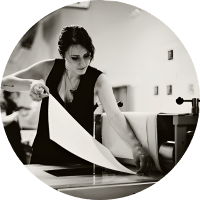
Intaglio printmaking is a technique where an image is etched onto a plate, the sunken areas on the plate are filled with ink, then paper or canvas is pressed with the plate leaving the desired image. Our customer / resident expert, Chicago-based Bryn Gleason does something a bit more complicated.
First, she uses a mixture of ferric chloride acid, steel hand tools, and polish to work the copper. For some of her more complex images, she will develop images from photographs onto a sticky film. Then the film adheres to the copper. Next, she uses acid to etch the image into the sheet. Finally, the film is peeled off and she finishes the etching with hand tools.
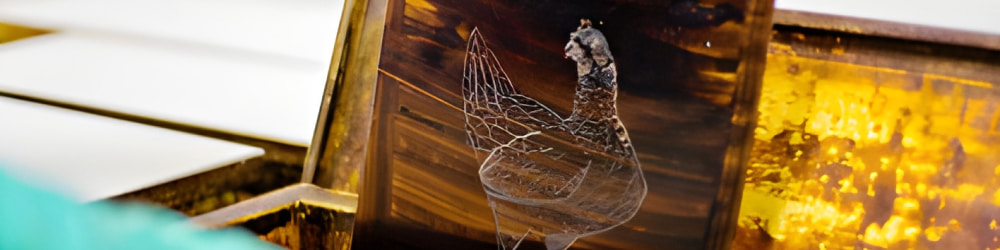
Once the image is etched into the copper, the plates are covered in heated ink. Then the surface of the plate is wiped, removing the excess ink outside of the sunken areas. Finally, the inked plate is used to make her prints.
Bryn tells us that the entire process can take a few months to complete from start to finish. It is a somewhat tedious process, and many artists get frustrated by how slow it can be. Bryn specifically points out that to do this well, you must make test prints of the unfinished plate so you can see where you need to make changes. Typically, she makes 5-20 test prints before finishing the plate.
What Is Needed for Acid Etching?
- Your acid – this will be determined by the type of metal you are etching, though we generally recommend you use Ferric chloride.
- Ferric chloride – Works best on copper, brass, nickel silver, and stainless steel. Mix with water at a 1:1 ratio.
- Copper sulfate – Best for mild steels. Mix it with a 1:1 ratio of common table salt to prevent a fine layer of copper sulfate from coating the metal and preventing proper etching.
- Nitric acid – Works well on most metals. Mix it with water at a rate of 1 part acid per 3 parts water. Or it can be mixed at a 1:1 ratio with acetic acid (vinegar).
- Sulfuric acid – Works well on most metals. However, it must be heavily diluted to a concentration of 10-25% acid.
- Metal file
- Abrasive cleaner (Such as Penny Brite or Bar Keepers Friend) or acetone.
- An abrasive sponge, or Brillo pad, or very fine steel wool.
- Two non-reactive containers (glass or plastic) – One will hold the acid that you will suspend your metal in. Make sure it is large enough to completely submerge the piece. The second will hold a 1:1 mixture of water and an acid neutralizer.
- Your resist.
- Suspension method.
- An old toothbrush.
Essential Safety Equipment and Guidelines
Acid etching is easy and less expensive than you’d guess. The main issue is to make sure you’ve got your safety equipment ready. You are dealing with acid for this process, so there will always be some innate hazard involved. Make sure you have all your personal protection equipment (PPE).
- Rubber/latex gloves
- Face mask and eye protection. The process does create fumes that will cause irritation if you breathe them in or get them in your eyes. Hence, we also suggest you have a fan and do this in a well-ventilated area.
- An acid neutralizing basic substance, baking soda works well. – You will use this to finish etching your plate. But also having some baking soda on hand in case you spill any acid is a good idea. Pour the baking soda on any acid if that happens.
Getting Started with Acid Etching
1. Choose Your Material for Acid Etching
What metal you choose slightly influences the process of etching. For example, Nickel Silver and steels take longer to etch than copper or brass.
2. Prep Your Material for Acid Etching
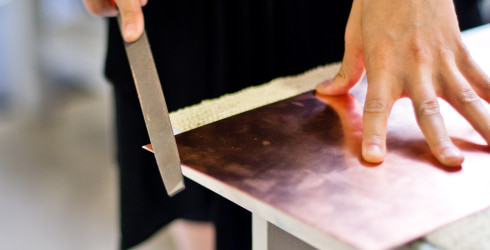
Your piece must be completely clean before it can be etched. Oils, tarnish, or other chemicals will negatively impact how well the etching works. First, make sure that the edges of the piece are filed down and not sharp. Then make sure the surface is prepped. There are a few methods you can use here.
The easiest is to soak the piece in acetone. This is quick and simple, but sometimes certain tarnishes can survive the acetone bath.
You can also scrub the piece down with a Brillo pad or some other sort of abrasive scrubbing pad. This will leave a brushed finish on your surface that will impact how the final piece looks. Some people love that and use this method specifically to get that different finish. Other people dislike it and generally choose the third method.
For that, use a normal sponge and an abrasive cleaner like Penny Brite or Bar Keepers Friend to clean the piece. This will give you an even and polished finish.

3. Apply The Resist
Other than designing your pattern, applying the resist is the step that is most open to personal interpretation.
First, the material you choose as a resist is very open ended. There are numerous inks specifically designed for etching that you can use. There are also more easily found materials you may already have around your house! Permanent marker ink, like a Sharpie, works well as a resist. Nail Polish and even masking tape also work well. Back in my high school chemistry class we made ornaments using masking tape as a resist.
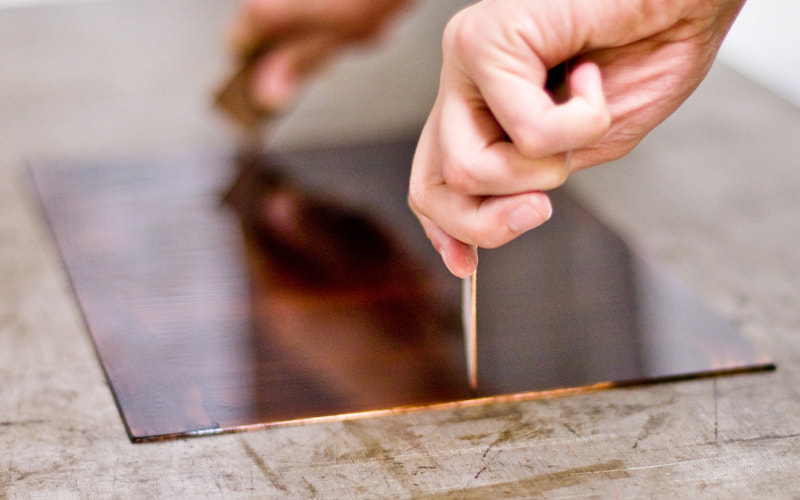
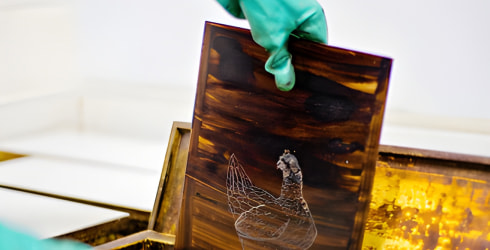
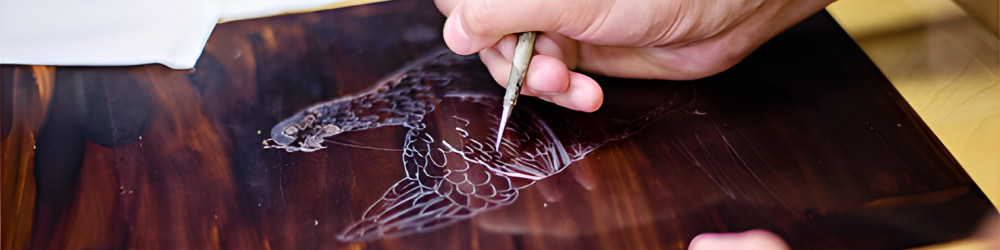
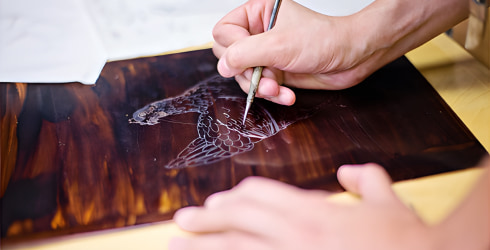
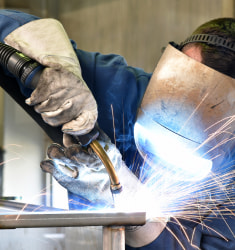
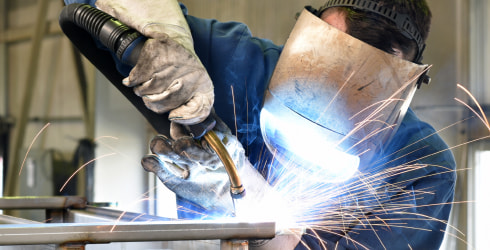
Once you have your resist chosen, you need to apply it. The two main methods here are to cover the entire piece with the resist, or only cover part of it. In the images we’re using here of Bryn Gleason, you see she covers the entire plate in the resist. Other people, especially folks' acid etching knives, will only cover certain parts of their pieces with a resist. It all really depends on how much of the material you want to be etched.
Once you have decided that, apply the resist. Make sure the edges and backs are also covered. If you are etching a knife, make sure that the beveled edge of the blade is covered. Apply with sponges, cotton swabs, nail polish brushes, or just draw it on. Whatever your resist is, apply it in the most appropriate method.
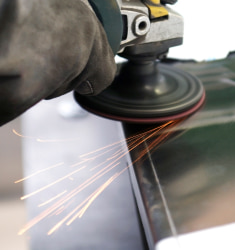
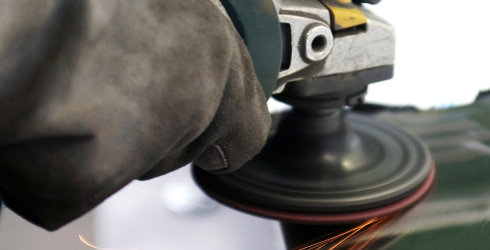
4. Create Your Design
If the application of your resist is the pattern, skip to Step 5.
But if not, now is the time to make your design. If your resist is ink or wax, use a tool to scrape away the image that you want. You can see an example of this in the picture below. If you used masking tape draw your design on the tape and then cut away those portions you want to be etched.
Here’s where you really can let your creativity shine!
5. Etch Your Material
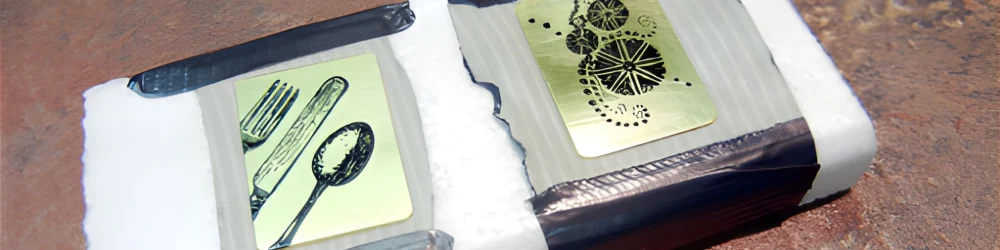
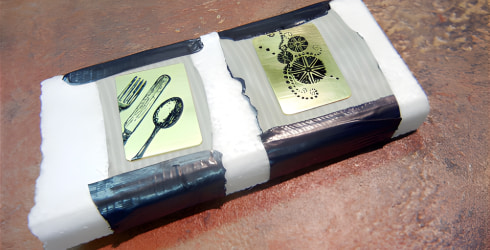
First, make sure that your PPE is on. Next, you’ll want to suspend your piece in the acid bath. There are three main methods to this, and they largely depend on what you are making.
The method you choose to suspend your metal in the acid bath is the most complicated part of this entire process.
Suspension Method:
- Setting the material inside – If you are making a printing plate or other piece where only the side is etched and your tub is deep enough, you can just set the piece inside. If you opt for this method, make sure the portion being etched is face up.
- Styrofoam boat – This works best for small pieces. Use duct tape to affix the piece to the bottom of a small block of Styrofoam. Make sure the portion being etched is facing away from the foam. Set the “boat” in the acid, with the material face down. The block will float on the acid and can be easily removed.
- Plastic String – This is best for smaller pieces where both sides are getting etched. Just tie the piece with plastic string and suspend it in the acid.
Whatever method you choose, just make sure the parts you want etched are unobscured.
Place the pieces into the acid bath and set your timer. The amount of time you need to leave the pieces in the acid depends on the metal, how thick the piece is, and how deeply you want it etched. Generally, you will etch it for 30-90 minutes. We advise that when you are new to this, pull the piece out to check it every 10 minutes and see how you like it. As you become more experienced, you can let it sit for longer.
Also, from time to time, tap the container to keep the acid agitated.
6. Clean Your Piece
Once you’ve got the piece etched to your satisfaction, pull the piece out and put it in the acid neutralizing bath of water and baking soda. A reminder, that bath is a 1:1 ratio of water to baking soda.
The bath will fizzle a bit, which is fine. Let it sit for a minute or so. Then, take a toothbrush with baking soda on it and scrub any deep portions of the piece. This will help make sure all the acid is gone.
Next, once the acid is fully neutralized, rinse off the baking soda with water.
Lastly, remove the resist from your piece. Acetone generally works well for that.
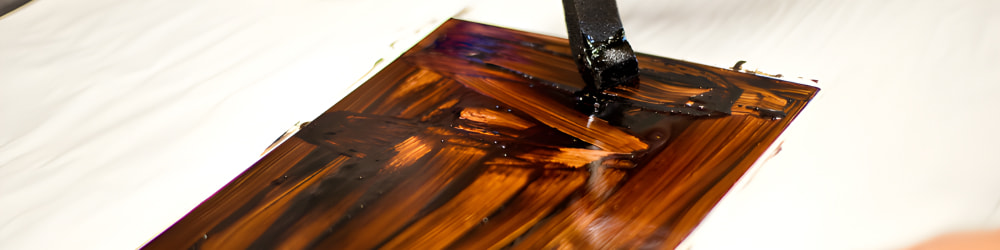
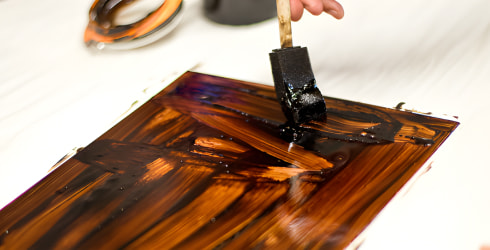
At this point if you so desire and are working with copper, you can apply a patina. To do this, just apply some liver of sulfur where you want the patina. For copper, this will create a black or dark brown patina. Many artists apply this to the recessed areas of their pieces then wipe and clean the elevated parts of the metal. The process creates a sharp relief to highlight your work.
Congratulations! You have successfully completed your first acid etching!

Alternate Methods
Concerns about the health effects of long-term exposure to acids and solvents caused research into less toxic etching methods. One etching system uses acrylic polymer as ground and ferric chloride for etching. The polymers are removed with sodium carbonate (washing soda) solution, rather than solvents. Acrylic polymer etching can also be done successfully on softer metals such as aluminum sheet.
Saltwater etching is another alternative method that can be done with household ingredients, and on the cheap! However, while the ingredients are mild this method does produce toxic gas that should not be breathed in. So, exercise caution! Make sure that you have proper ventilation and some sort of mask to prevent inhalation of the fumes.
Acid Use & Disposal
Your acid can be used for multiple DIY acid etching projects. This is part of why the cost is low. Eventually though, acid loses its strength.
When you are done with your acid, don’t pour it down your drain! This will damage them. Ideally, put the acid into a plastic bottle, mark what the contents are, then take it to a local hazardous waste disposal location. If you don’t have access to a hazardous waste disposal facility, there is another good option. Pour kitty litter into the acid. Once it has fully absorbed the acid, mix in more baking soda and let it sit for a bit. Once the acid is neutralized, this can go in the garbage.
About the Featured Expert
Bryn Gleason
Chicago-based Artist
etsy.com/shop/BrynGleason
Bryn is an incredibly talented printmaking artist based out of Chicago. She studied Social Work at the University of Minnesota, which involved research surrounding Family Violence Prevention, leaving a great impact on her and her early artwork. Bryn loves working with clients to create something custom, whether it's in alignment with her portfolio's concepts or not.
Would You Like To Know More?


About Online Metals
Online Metals is the world’s leading eCommerce metal supplier, specializing in small quantity cut-to-size metals and plastics, delivered in a fast and reliable manner.
Since 1998, Online Metals has expanded our catalog to over 85,000 different cut sizes, grown our national footprint to seven pickup locations across the U.S., and continued to improve upon our best-in-class customer experience.
Check out our materials: Alloy Steel, Aluminum, Anodized Aluminum, Beryllium Copper, Brass, Bronze, Carbon Steel, Copper, Cast Iron, Nickel, Nickel Silver, Plastic, Stainless Steel, Titanium, Tool Steel, Unistrut®, Wrought Iron, & Zinc
Shop by shape: Bars, Tubes, Sheets, Plates, and More.
Can't find what you're looking for? Submit a quote or contact our support team.

 Continue modifying your quoted cart?