


DIY Metal Wind Chimes
DIY wind chimes come in as many designs as the homes and gardens they adorn. From leftover dinner utensils to forged brass and glass, every maker chooses materials to match what they want. One of the best parts of DIY wind chimes is that almost any material can work, though metal and wood are typically the most preferred.
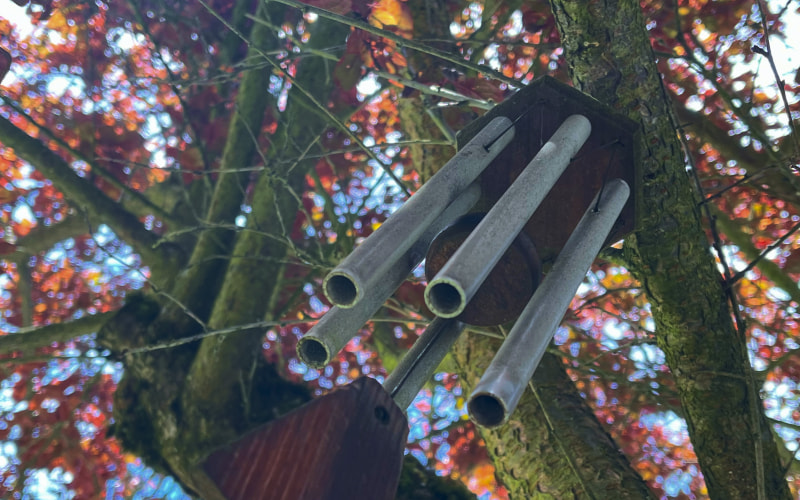
Of the metals, Brass is the most prized because of its sound and timbre. This is the same reason why brass is typically used in musical instruments. However, Copper is another popular choice due to the sound and the patina that it develops. Stainless steel and Aluminum are the most commercially common due to their low cost and corrosion resistance. With a few simple materials and a few steps, you’ll have a soothing song in your garden in a day! For our wind chimes, we chose to go with Stainless Steel and Wood.
Materials List
- 7 lengths of round tubes of a metal of your choice
- Make sure the OD and Wall are the same for all.
- Lengths were: 12″, 14″, 16″, 18″, 20″, and 22″ long.
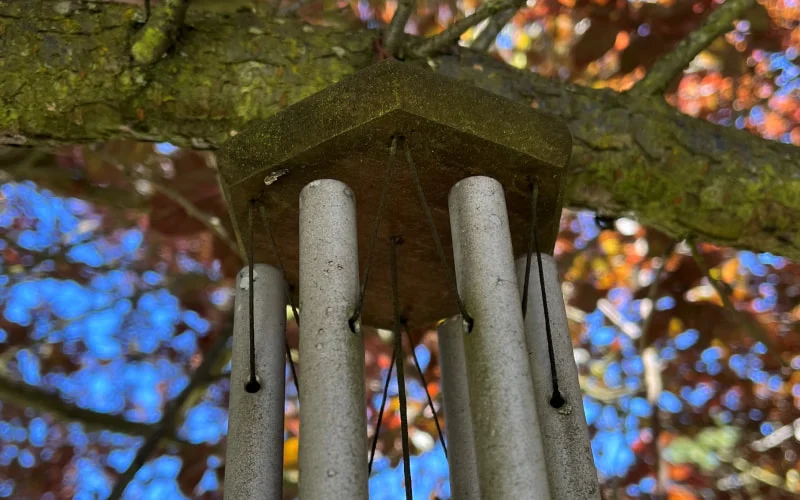
- 1 wooden disc / rounded shape 8″ diameter
- 1 wooden disc 4″ diameter
- Wooden or metal rectangle, 2″ x 4″
- String or cord

Step by Step Instructions
Drilling Your Holes (Steps 1 - 3)
Step 1: Drill a small hole in the end of each tube (Drill all the way through the tube)
Step 2: Drill holes through the middle of both wooden discs and in the middle near one edge on the tag.
Step 3: On the larger wooden disc, drill six holes near the edge, evenly spaced around the disc.
Connecting with String (Steps 4 – 7)
Step 4: Cut six lengths of string, each 8″ long. Then, put a length of string through the holes you drilled earlier in each of the metal tubes. Pull the string up so the tube is hanging in the middle.
Step 5: Take the other two ends of the string and put them through a single hole of the outer rind on the larger wooden disc. Tie them off at the top above the wood. Repeat for all six tubes.
Step 6: Cut a length of string around 12″ long then slide the string through the center hole on both wooden discs. The smaller disc is below the larger and between the tubes. Tie off two knots. One below the smaller disc to hold it in place, the other above the larger disc to keep the string from falling through. Finally, take the other end of the string, and tie it through the hole on the tag.
Step 7: Cut three pieces of string, about 6″-8″ long. Knot one end of each. Then slide them through the inner triangle of holes on the larger wooden disc, the knots on the bottom with the string feeding out the top. Tie the three strings together at the top, ending in a hook or whatever else you’d like to use to hang them.

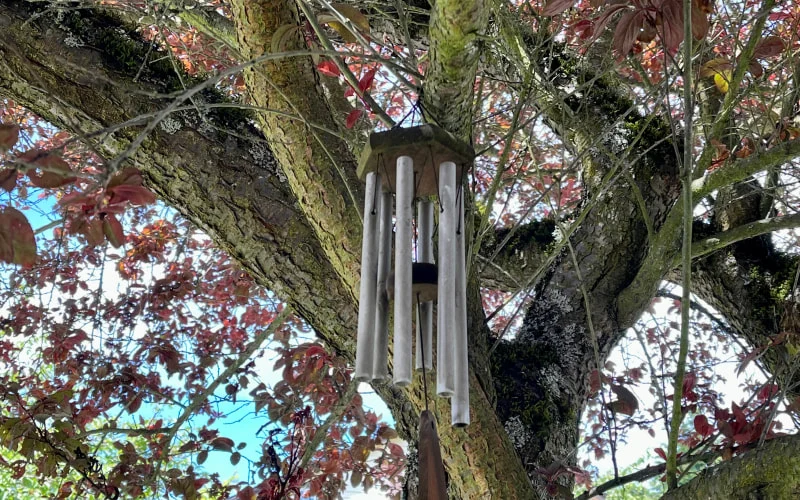
Ta-da! You have gorgeous, DIY Metal Wind Chimes. Add a picture of yours to our Made With Metals Gallery to show us how yours turned out.
Would You Like To Know More?


About Online Metals
Online Metals is the world’s leading eCommerce metal supplier, specializing in small quantity cut-to-size metals and plastics, delivered in a fast and reliable manner.
Since 1998, Online Metals has expanded our catalog to over 85,000 different cut sizes, grown our national footprint to seven pickup locations across the U.S., and continued to improve upon our best-in-class customer experience.
Check out our materials: Alloy Steel, Aluminum, Anodized Aluminum, Beryllium Copper, Brass, Bronze, Carbon Steel, Copper, Cast Iron, Nickel, Nickel Silver, Plastic, Stainless Steel, Titanium, Tool Steel, Unistrut®, Wrought Iron, & Zinc
Shop by shape: Bars, Tubes, Sheets, Plates, and More.
Can't find what you're looking for? Submit a quote or contact our support team.

 Continue modifying your quoted cart?