


DIY Corten Steel Planters
There's something truly special about mastering your garden and making it your own. From the gentle rustle of leaves to the vibrant colors of blossoming flowers, the beauty of plants can transform any space into a peaceful oasis. However, store-bought planters can be costly, not to mention lacking in character.
That's why there's no better time than now to embrace your inner DIY enthusiast and create your own unique planters. With just a few simple materials (CORE-TEN Steel, Aluminum) and a dash of creativity, you can craft planters that perfectly fit your personal style. Let's jump right in!
DIY Corten Steel Planter Blueprints/Dimensions
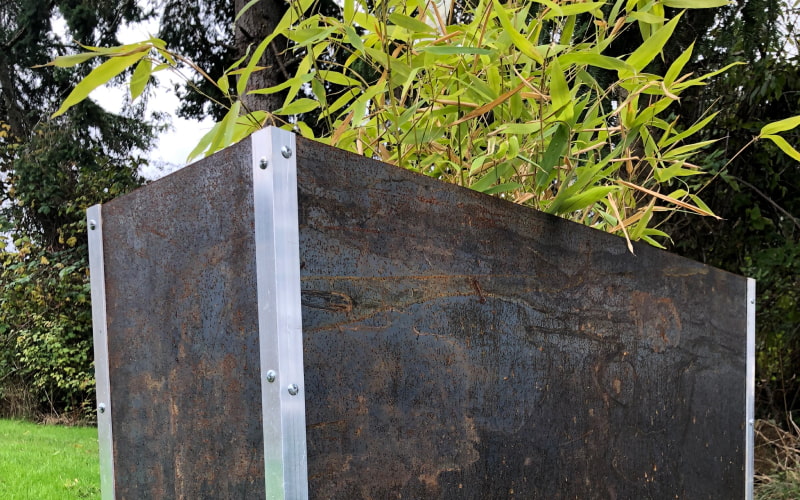
Planter Dimensions: 12” deep x 36” wide x 24” tall.
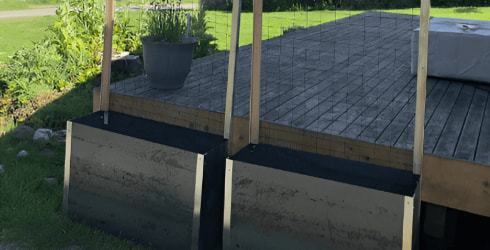
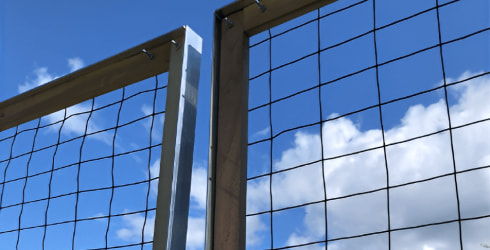
Planter with Built-in Trellis: 2’ tall x 3’ wide, aluminum angle corner braces extended to 6’ tall, and connected at top with 3’ wide header. Goat wire inlay fastens to angle with small wood trim to hold wire and finish the edges. Trellis side of the planter may be fastened to a deck or stakes to prevent tipping.
What Materials To Use for Corten Steel Planter
- 2x sheets 12”x24” 16 ga. Weathering (CORE-TEN) Steel Sheet A606/A588A
- 2x sheets 24”x36” 16 ga. Weathering (CORE-TEN) Steel Sheet A606/A588A
- 4x pieces aluminum angle 24” long (1”x1”x0.062”)
- Machine screws – 32 (8 per joint)
Optional Trellis Materials:
- 2x pieces 24” long aluminum angle; 2x pieces 68” long, 1x piece 36” long
- Extra screws to fasten header as well as trim wood
- Goat Wire
- Wood
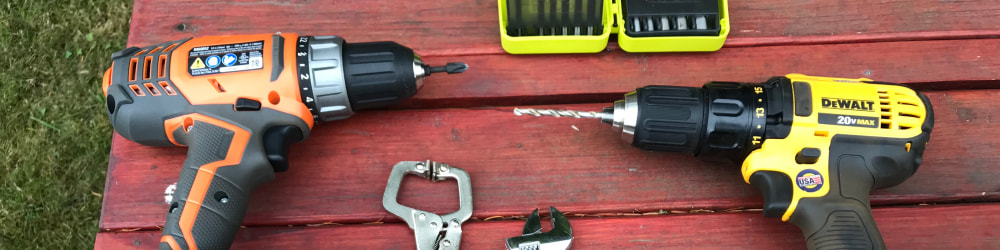
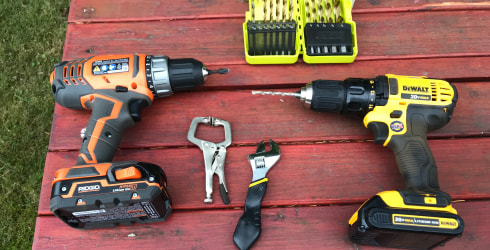
List of Tools Needed:
- Drill w/ 11/64 drill head
- Screwdriver
- Clamps
- Measuring tape
- Marker

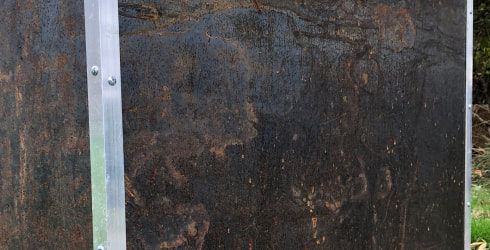
How to Achieve the Weathered Look for Planters
Prepare the surface: Start by cleaning the sheets to remove any dirt, dust, or oils. You can use soap and water or a mild detergent to clean the surface thoroughly. Rinse it well and let it dry completely.
Accelerate the weathering process: Weathering steel naturally develops a protective layer of rust that gives it a weathered look. To accelerate this process, you can expose the sheet to a combination of moisture and air for a certain period. This will help the rust develop more quickly.
- Mist the surface: Spray the sheet with water or mist it using a spray bottle. Make sure the surface is evenly damp but not soaking wet.
- Expose to air: Place the sheet in an area where it can receive ample airflow. Outdoor exposure is ideal, but if that's not possible, ensure there's good ventilation in the indoor area. The moisture and air will facilitate the rusting process.
- Repeat the process: Depending on the desired level of weathering, you may need to repeat the misting and exposure steps multiple times. Monitor the sheet's progress and adjust as needed.
- Allow time for oxidation: The weathering process takes time, and the extent of rusting depends on the environmental conditions and the specific characteristics of A606. Patience is key as the weathering effect develops gradually.
Optional: Once you achieve the desired weathered look, you can consider sealing the surface to prevent further rusting or to maintain the current appearance. Various clear sealants or metal coatings designed for outdoor use can be applied according to the manufacturer's instructions. This step is optional, as some people prefer to let the natural weathering continue.
Remember that A606 may contain residual oils or substances from the manufacturing process, which can affect the rusting process. Thoroughly cleaning the surface at the beginning helps ensure better weathering results.
Additionally, when using weathering steel for planters, it's essential to consider drainage and protect the plants' roots from direct contact with the metal. You can use liners or create a separate waterproof container within the planter to address these concerns.
Step-by-step Process
Step 1
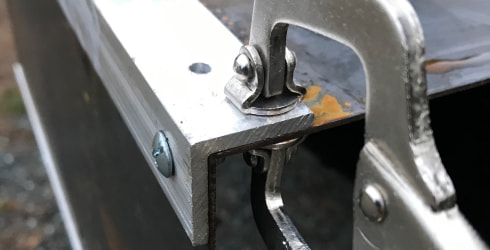
Once you have your materials laid out, you're going to take your aluminum angles and measure and mark out where to drill. Each angle will require 8 holes to drill through.
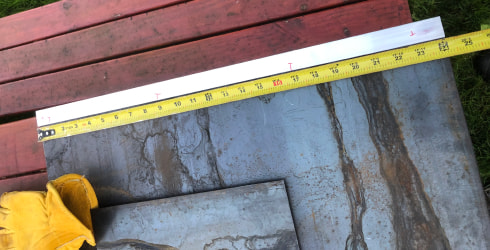
To ensure the screws don’t overlap they need to be slightly offset. On one side, your first mark is one inch down, second is 6”, then 8” for the next two. You will need to start from the bottom on the other side of the angle as mentioned to avoid crossing screws.
Step 2
Drill holes into the aluminum angle pieces, making sure they align with the corners of the weathering steel sheets.

Step 3
Drill holes in the weathering steel sheets that correspond to the holes in the aluminum angle pieces.
Step 4
Attach the aluminum angle to the weathering steel sheets using the machine screws and screwdriver. Make sure the screws are tight and secure.

Optional Trellis
- Attach the two short lengths of aluminum to the front and short sides of the planter.
- Attach the back panel with the longer angles – they will extend 4 feet above the planter box.
- Drill holes and attach the 3’ angle piece to the top of each of the long angles, as a header, forming a sturdy frame. Make sure to offset the holes so that the screws in each corner will not collide.
- Prepare for attaching the goat wire and wood trim: Drill holes about every 12 inches in the aluminum angle pieces (align the wood trim and mark the holes – drill corresponding holes in the wood trim)
- Cut the goat wire 3’ wide by 4’ long.
- Attach the wire to the aluminum angle frame: Lay the wire across the frame and overlay the wood trim inside the angle face. Attach the wood to the aluminum angle with machine screws, compressing the wire between the wood trim and the aluminum frame.
Step 5
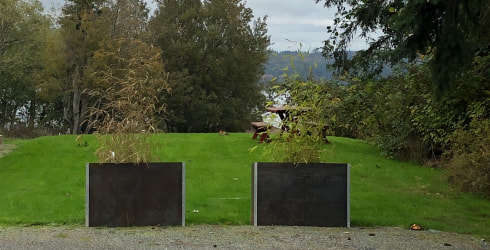
Fill the planters with soil and/or plants of your choice! Alternatively, potted plants can be placed inside the planter shell if you would like the planter to be movable.

Congratulations! You have successfully built your own planters and your garden has never looked better. Head to our “Made with Metals Gallery” and add your photos and let us know how it went.

About Online Metals
Online Metals is the world’s leading eCommerce metal supplier, specializing in small quantity cut-to-size metals and plastics, delivered in a fast and reliable manner.
Since 1998, Online Metals has expanded our catalog to over 85,000 different cut sizes, grown our national footprint to seven pickup locations across the U.S., and continued to improve upon our best-in-class customer experience.
Check out our materials: Alloy Steel, Aluminum, Anodized Aluminum, Beryllium Copper, Brass, Bronze, Carbon Steel, Copper, Cast Iron, Nickel, Nickel Silver, Plastic, Stainless Steel, Titanium, Tool Steel, Unistrut®, Wrought Iron, & Zinc
Shop by shape: Bars, Tubes, Sheets, Plates, and More.
Can't find what you're looking for? Submit a quote or contact our support team.

 Continue modifying your quoted cart?